
Quick Start Tutorial
Create your first narrated webtoon video in about 15 minutes
Quick Start Tutorial
This guide walks you through creating your first narrated webtoon video from start to finish. By the end, you'll have a fully narrated video ready to upload.
What you'll need:
- WTN Suite installed (download here)
- An AI API key (Google AI or OpenAI — free tiers available; Anthropic also supported)
- A webtoon you want to narrate
- About 15–20 minutes
The Workflow at a Glance
WTN Suite follows a simple 2-step pipeline: Load Panels → Analyze & Narrate — then export to audio and video. Let's walk through the full process.
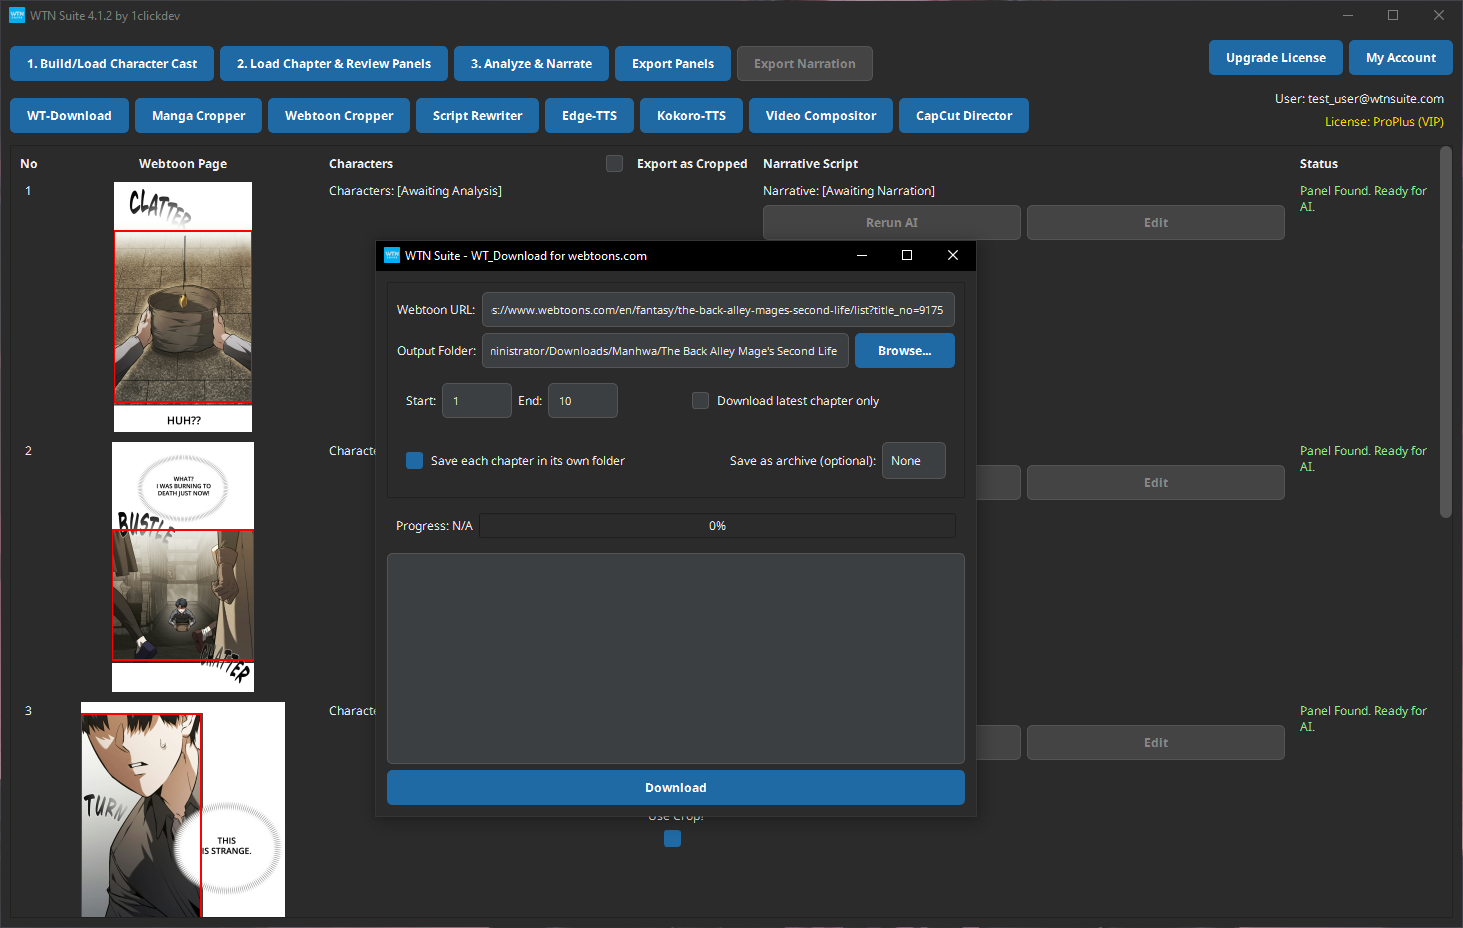
Download a Webtoon Chapter
Open WT-Downloader from the toolbar and paste a webtoon URL (e.g., https://www.webtoons.com/en/...). Choose your output folder and click Download.
The tool downloads all page images and organizes them automatically into numbered files.
Set Up Your AI Key (First Time Only)
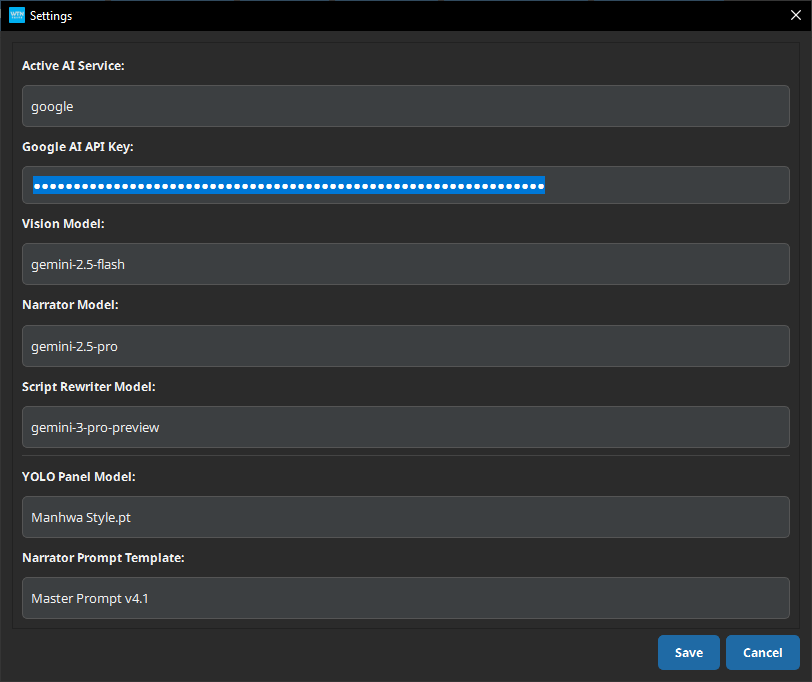
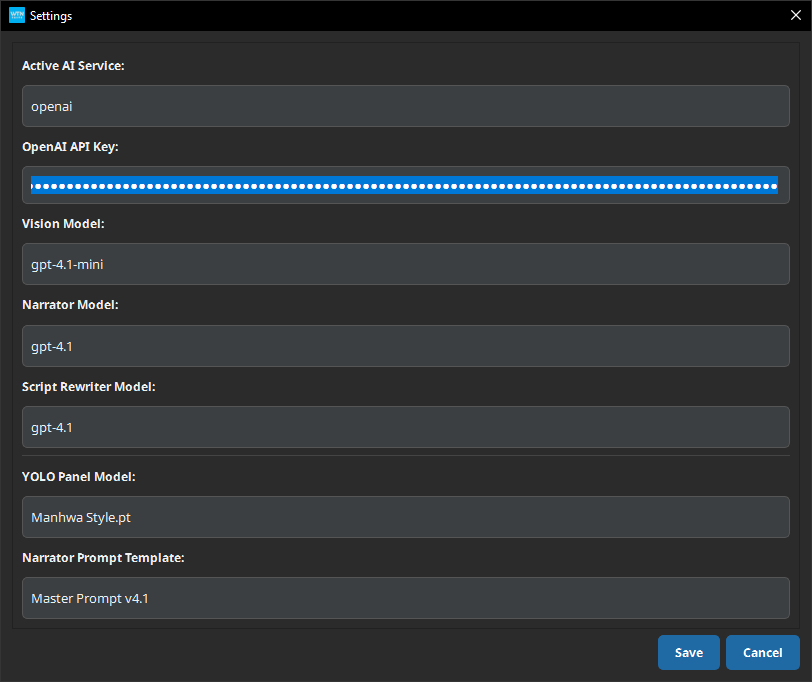
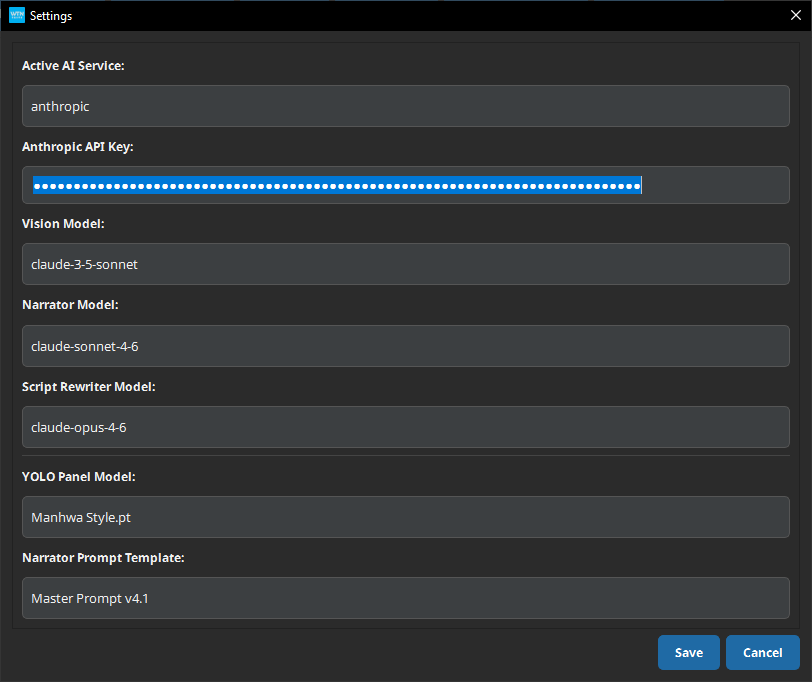
Go to Settings (gear icon) and enter your API key:
- Google AI (Gemini): Get a free key at Google AI Studio
- OpenAI (GPT-4/5): Get a key at OpenAI Platform
- Anthropic (Claude): Get a key at Anthropic Console
You only need one. Google AI has a generous free tier, making it a great place to start.
💡 Tip
Google AI's free tier gives you enough API calls to process several chapters per day at no cost.
:::
Load Your Chapter
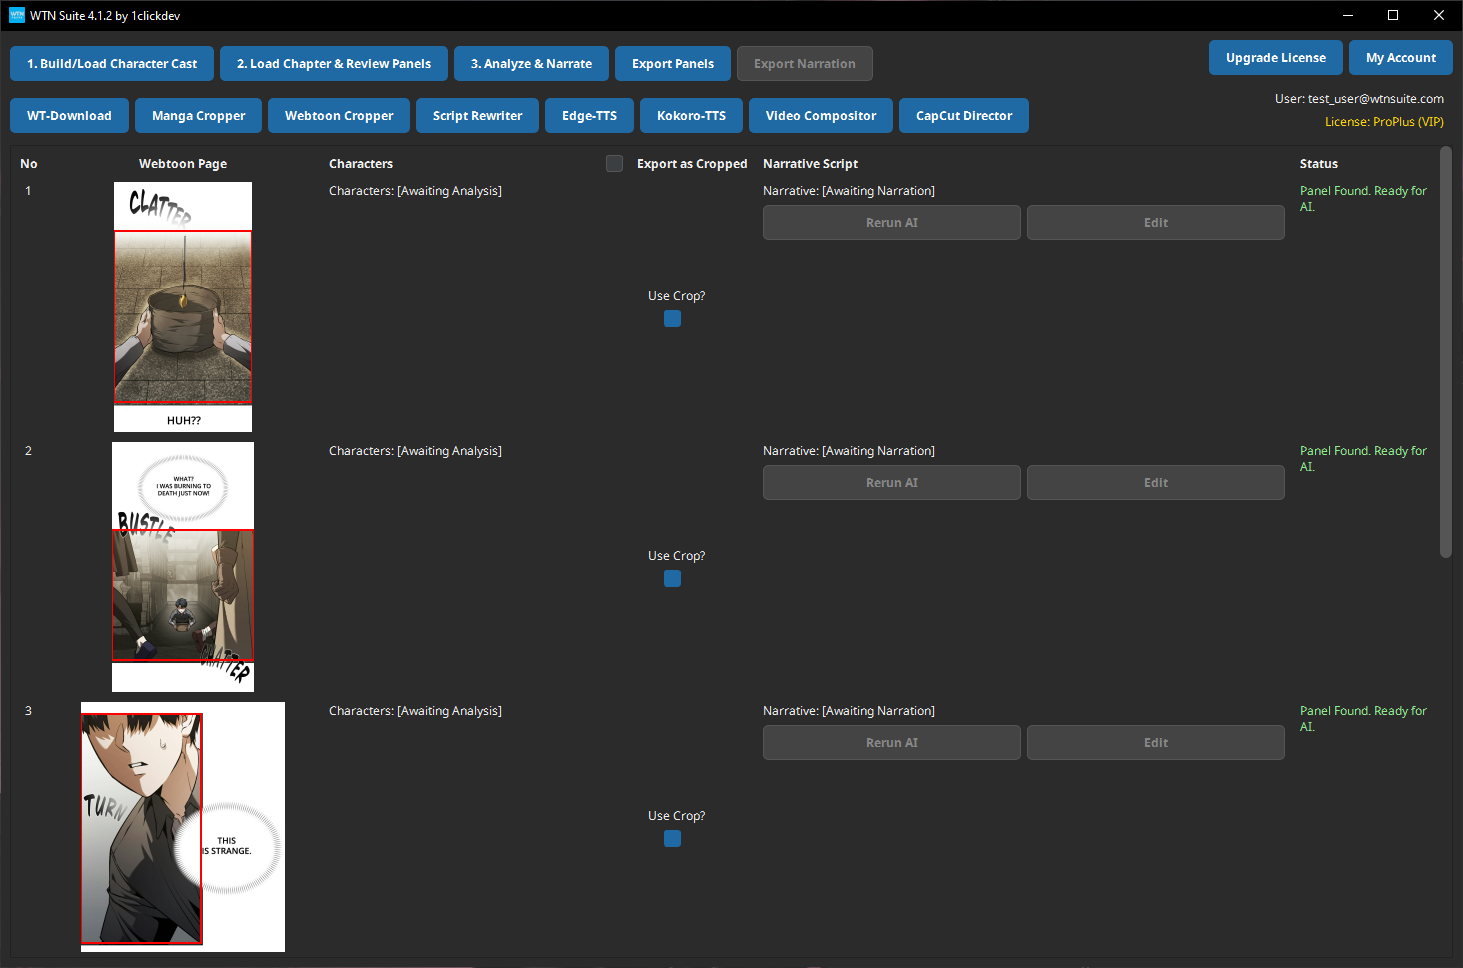
Click "Load Chapter & Review Panels" on the main toolbar. Select the image files you downloaded in Step 1.
WTN Suite's panel detection AI automatically scans each page and separates it into individual panels. You'll see them appear in the main grid.
ℹ️ Info
The AI works with both webtoon-style (vertical scroll) and manga-style (page layout) content. You can choose which detection mode to use in Settings.
Auto Character Handling is built in — the AI will automatically detect and track characters across panels when you run the analysis in the next step. No manual character setup required.
:::
Run the AI Pipeline
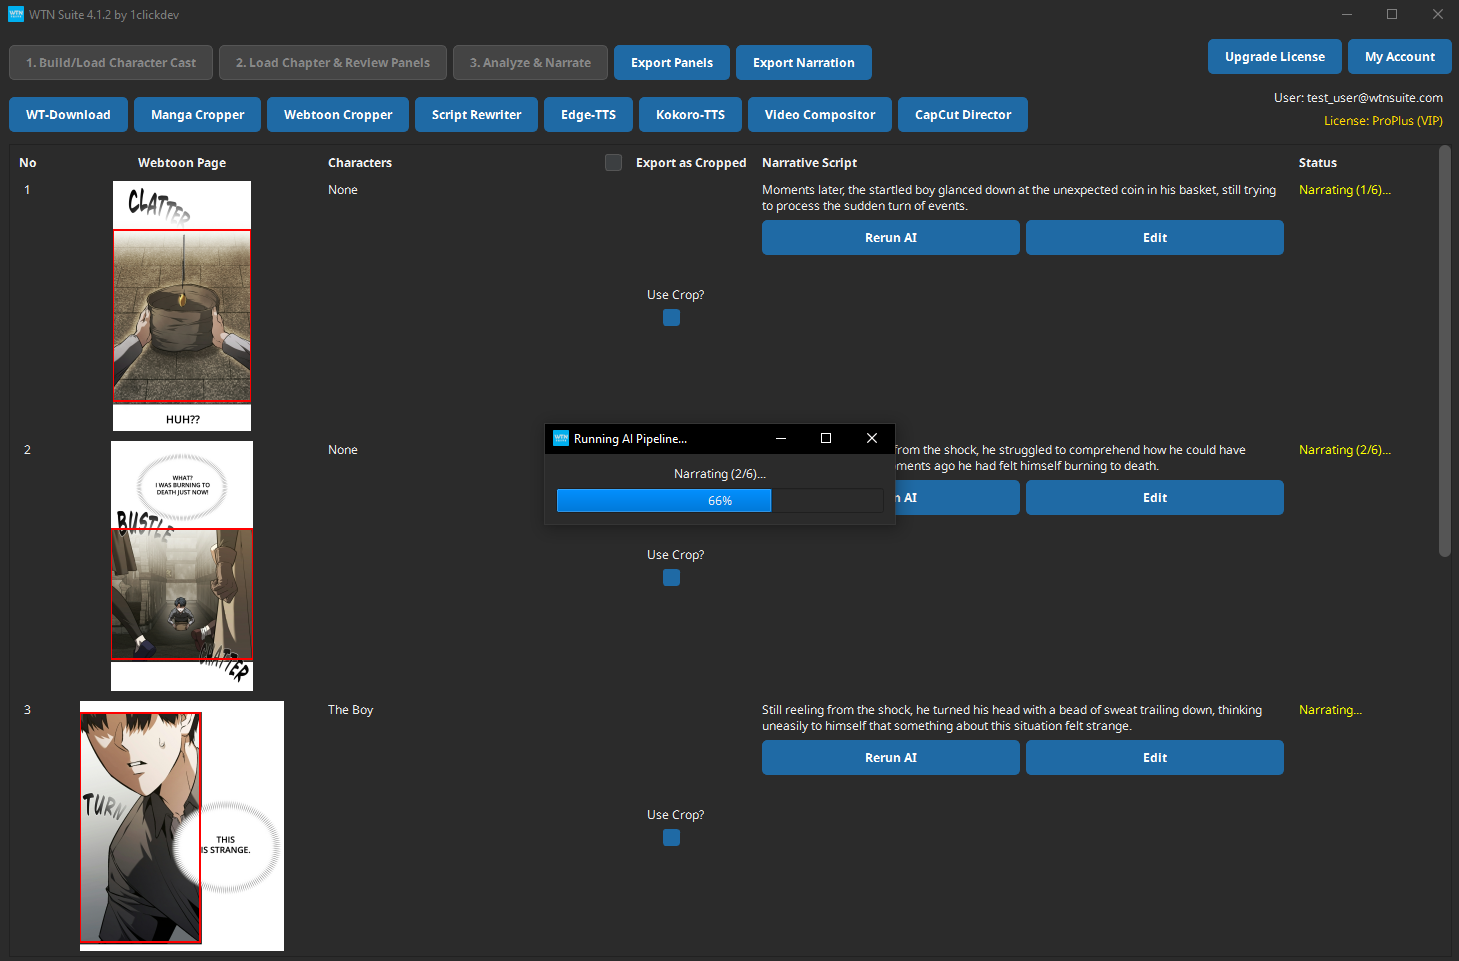
Click "Analyze & Narrate". The AI does two things automatically:
- Scene Analysis — Looks at each panel and identifies what's happening (characters, actions, mood)
- Narrative Writing — Writes a narration script that tells the story across all panels
A progress bar shows the status. A typical 30–40 panel chapter takes about 3–5 minutes.
💡 Tip
You can review and edit any narrative text after processing. Click "Edit" next to any panel's narration to make changes.
:::
Generate Audio Narration
First, export your narration from the pipeline: click "Export Narration" in the main window. This saves a TXT file with one narration line per panel.
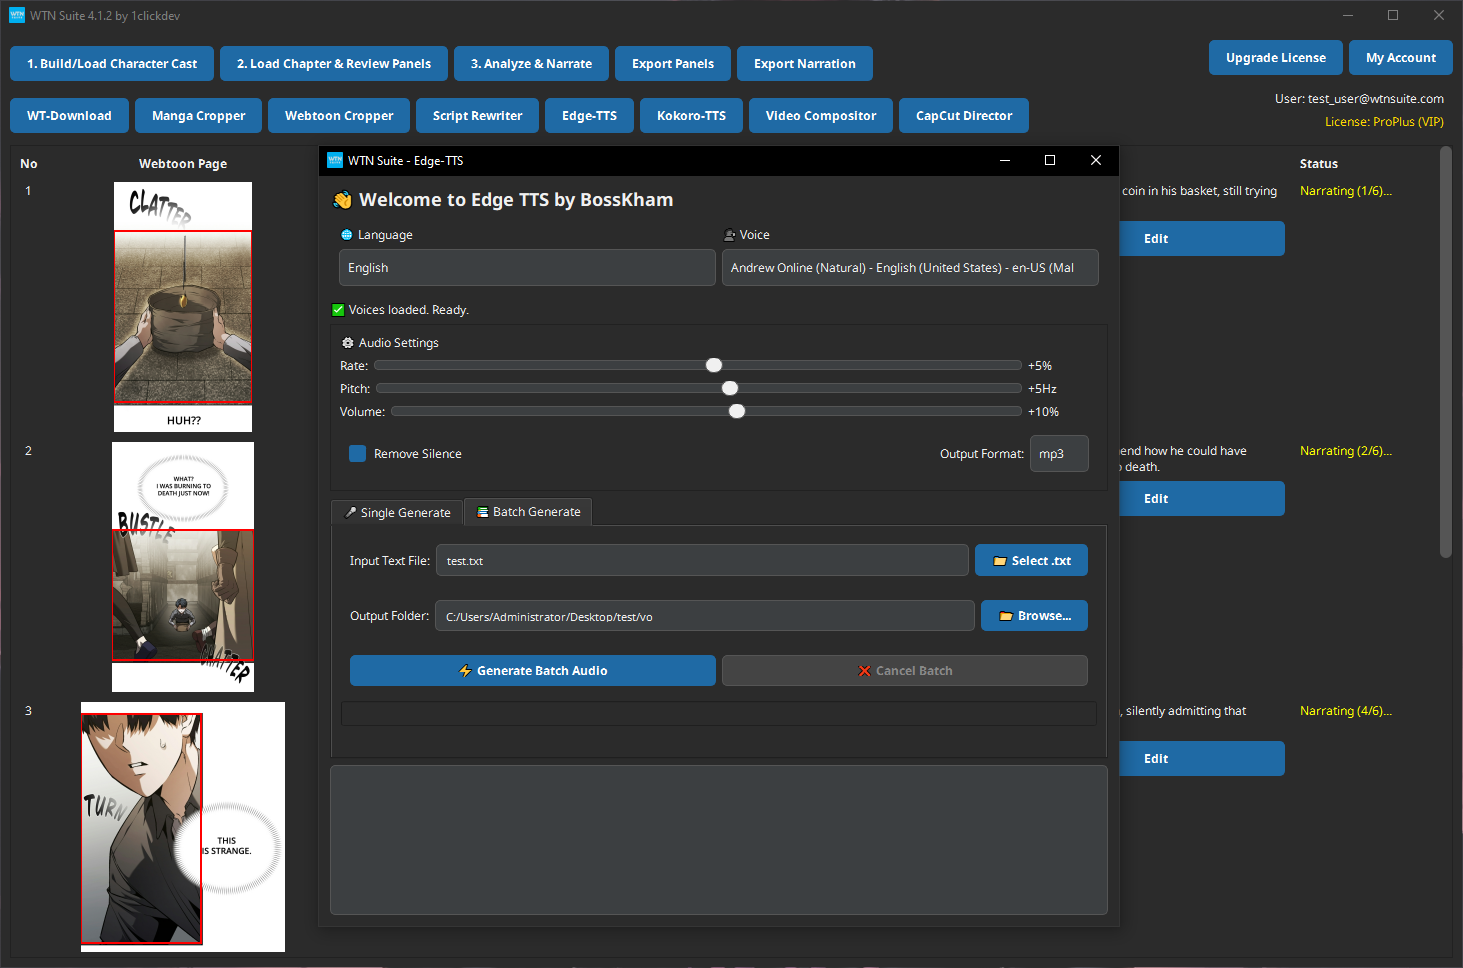
Then open Edge-TTS from the toolbar and switch to the Batch Generate tab — this creates one audio clip per panel automatically.
- Click 📁 Select .txt and choose the narration file you just exported
- Click 📂 Browse... and choose an output folder for the audio clips
- Choose a language and voice in the header
- Click ⚡ Generate Batch Audio
Edge-TTS generates one MP3 file per panel, numbered in order (narration_0001.mp3, narration_0002.mp3, ...). These numbered files are what the Video Compositor uses to match audio to panels.
ℹ️ Info
Single Generate vs Batch Generate: The Single Generate tab creates one audio file from whatever text you type — useful for testing voices. The Batch Generate tab is what you need for video production: it reads your exported narration file and creates one audio clip per line.
:::
Create Your Video
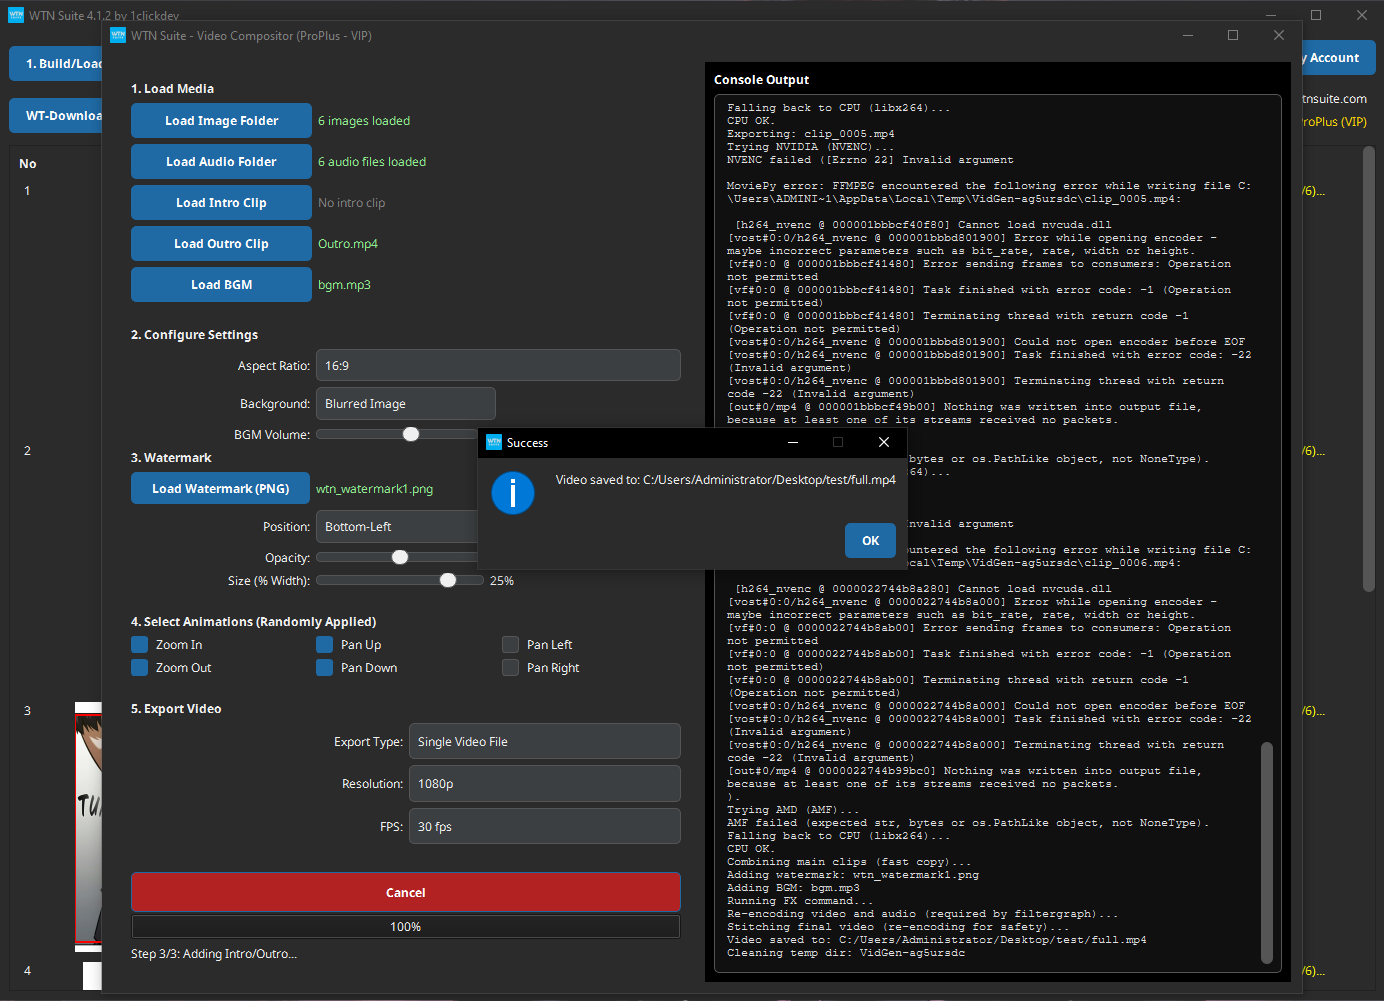
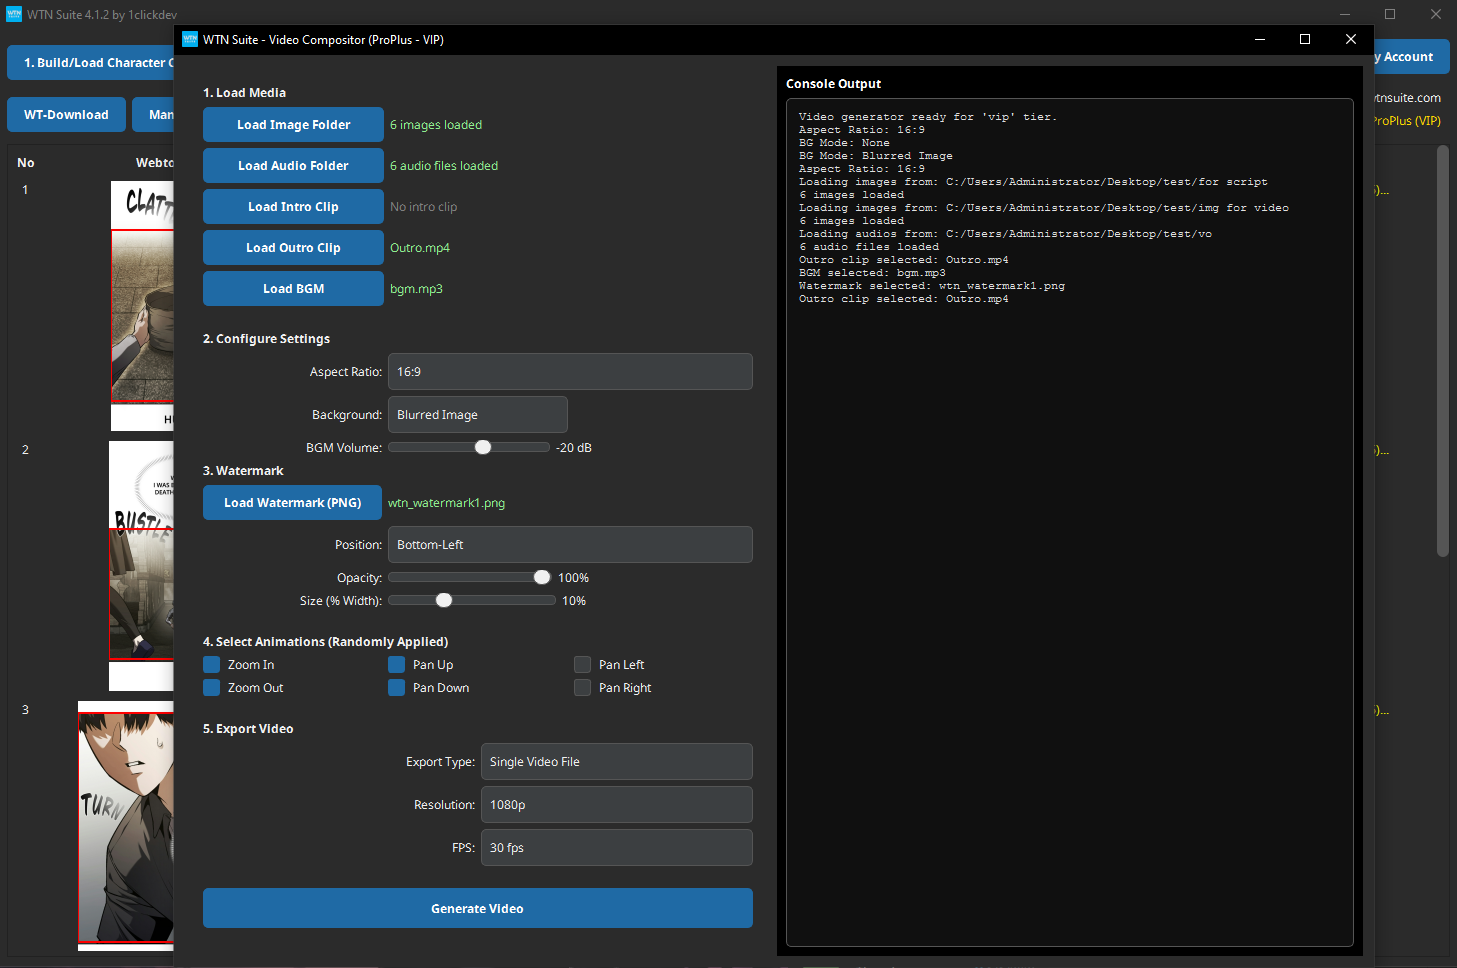
Open the Video Compositor and:
- Load Image Folder — point to your cropped panels
- Load Audio Folder — point to the audio files from Step 5
- Choose your settings (resolution, aspect ratio)
- Click Generate Video
Your narrated video is saved as an MP4 file, ready to upload to YouTube, TikTok, or any platform.
You're Done!
You've just created a narrated webtoon video. From here, you can:
- Better audio — Try Kokoro-TTS for higher-quality neural voices (Standard/Pro plans)
- Polish scripts — Use the Script Rewriter for more cinematic narration (Pro plan)
- Advanced editing — Export to CapCut Director for animations and subtitles
- Precise character names — Use the Character Builder to assign exact names to auto-detected characters
Troubleshooting Your First Run
⚠️ Warning
Panels not detected? Make sure your images are clear and high-resolution. If the AI misses some panels, you can click on any page image to manually adjust the crop area.
⚠️ Warning
API error? Double-check your API key in Settings. Make sure you've selected the correct AI provider (Google, OpenAI, or Anthropic) and that your key is active.
⚠️ Warning
Audio sounds wrong? Experiment with different voices in Edge-TTS. Adjusting the speech rate (try 1.0x–1.2x) can also improve results.
Next Steps
- Installation & Setup — Detailed system requirements and configuration
- Pipeline Overview — Deep dive into each pipeline step
- Settings & Configuration — Choose AI models and customize narration style