CapCut Director
Export your project to CapCut for advanced video editing
CapCut Director
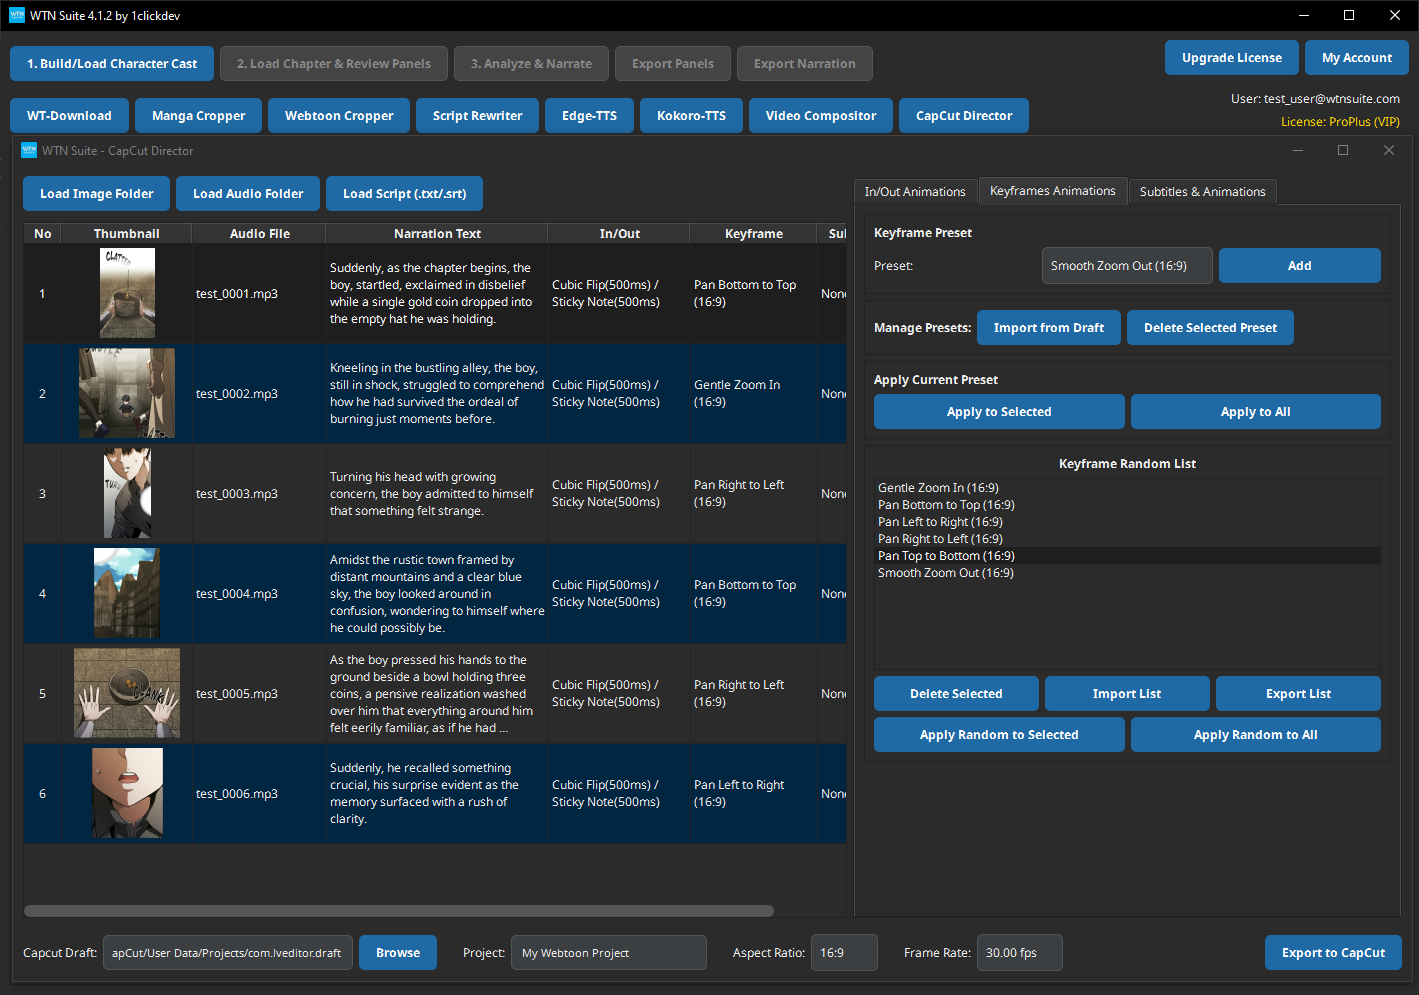
The CapCut Director creates project files that open directly in CapCut's desktop video editor. This gives you access to advanced features like animations, keyframes, and subtitles that go beyond the built-in Video Compositor.
📝 Note
Available on: Standard and Pro plans. CapCut is a free video editing application you'll need to install separately.
When You Need It
- You want animated transitions (zoom, slide, fade) between panels
- You want to add subtitles or text overlays
- You need keyframe-based camera movements (Ken Burns-style zoom/pan effects)
- You want full timeline editing control over your video
How to Use
Set Your CapCut Draft Path
In WTN Suite Settings, set the CapCut Draft Path to your CapCut drafts folder. This is where CapCut stores its projects — setting this path means exported projects appear automatically in CapCut.
Open CapCut Director
Click "CapCut Director" on the toolbar.
Load Your Content
Load your cropped panels and audio files, just like with the Video Compositor.
Configure Project Settings
| Setting | Options |
|---|---|
| Aspect Ratio | 16, 4, 9, 1, and more |
| Frame Rate | 24fps, 25fps, 30fps, 60fps |
| Project Name | Custom name for your project |
Set Up Animations
Choose entrance/exit animations, keyframe effects, and subtitle settings (see features below).
Export to CapCut
Click Export. The project file is saved to your CapCut drafts folder. Open CapCut and you'll see the project ready for editing.
Features by Plan
Standard Plan
Entrance/Exit Animations
- Choose how panels appear on screen (fade in, slide, zoom, etc.)
- Choose how panels exit (fade out, slide away, shrink, etc.)
- Control animation duration and timing
Keyframe Animations
- Position keyframes — move panels across the frame over time
- Scale keyframes — zoom in or out on panels (great for dramatic reveals)
- Rotation keyframes — tilt or spin effects
- Smooth easing — animations feel natural, not mechanical
💡 Tip
Keyframe animations are perfect for "Ken Burns" effects — slowly zooming into a dramatic panel or panning across a wide scene. These subtle movements make static panels feel alive.
Pro Plan (includes everything above, plus)
Subtitles
- Add text overlays synced to your narration audio
- Control timing, font, size, color, and position
- Animated subtitle appearances
Advanced Keyframing
- Additional keyframe properties
- More complex animation sequences
CapCut Director vs Video Compositor
| Feature | Video Compositor | CapCut Director |
|---|---|---|
| Output | Finished MP4 video | CapCut project file |
| Editing control | Basic settings | Full timeline editing |
| Animations | Basic transitions | Entrance/exit + keyframes |
| Subtitles | No | Yes (Pro) |
| Requires CapCut | No | Yes |
| Plan | All | Standard+ |
ℹ️ Info
Use the Video Compositor for quick, no-fuss video creation. Use CapCut Director when you want creative control and polished results. Many creators use the Compositor for first drafts and CapCut Director for final versions.
Tips
💡 Tip
Subtle animations work best. A slow 3-second zoom-in on a dramatic panel is more effective than aggressive zooming on every panel. Less is more.
💡 Tip
Add subtitles (Pro) for accessibility and engagement — especially for social media content where many viewers watch with sound off.
💡 Tip
After exporting to CapCut, you can add music, transitions, effects, and other polish in CapCut's full editor before rendering the final video.
Common Issues
⚠️ Warning
Project doesn't appear in CapCut? Make sure your CapCut Draft Path in Settings points to the correct folder. On Windows, this is typically: C:\Users\[YourName]\AppData\Local\CapCut\User Data\Projects\com.lveditor.draft\
⚠️ Warning
CapCut not installed? CapCut is a free desktop video editor. Download it from capcut.com before using the CapCut Director.
Next Steps
- Video Compositor — Quick video creation without CapCut
- Settings & Configuration — Set your CapCut Draft Path