Pipeline Overview
How WTN Suite's AI pipeline turns webtoon pages into narrated content
Pipeline Overview
WTN Suite's pipeline takes your webtoon pages and produces a narration script in two user steps. Internally, the AI runs three stages automatically — panel detection, scene analysis, and narrative writing.

How It Works
Your workflow:
| Step | What You Do |
|---|---|
| Step 1 | Click "Load Chapter & Review Panels" — AI detects and separates panels |
| Step 2 | Click "Analyze & Narrate" — AI analyzes every panel and writes the narration |
What the AI does internally:
| Stage | What It Does | Time Estimate |
|---|---|---|
| Panel Detection | Finds and separates individual panels from your pages | ~30 sec per page |
| Scene Analysis | AI analyzes each panel — characters, actions, mood | ~5 sec per panel |
| Narrative Writing | AI writes a narration script for the entire chapter | ~30 sec total |
After the pipeline finishes, you export the narration to audio (using Edge-TTS or Kokoro-TTS), then create a video with the Video Compositor.
Before You Start
Make sure you have:
- Webtoon page images loaded (from WT-Downloader or your own files)
- An AI API key configured in Settings
💡 Tip
No character setup needed. WTN Suite v4.1.7 includes Auto Character Handling — the AI identifies characters automatically during scene analysis. No manual character building required to get started.
ℹ️ Info
How many images can I process at once? WTN Suite can technically handle 500–700 images per run. However, we recommend processing one chapter at a time. Loading too many images in a single run increases the risk of hitting your AI provider's rate limits mid-run, which wastes API requests and tokens without producing usable output.
Step 1: Panel Detection
Click "Load Chapter & Review Panels" on the toolbar and select your image files.
WTN Suite uses a panel detection AI to automatically find and separate each panel from your pages. This works differently depending on the content:
| Mode | Best For | Set In |
|---|---|---|
| Manhwa Style | Korean webtoons (vertical scroll, clear panel borders) | Settings → Panel Detection Model |
| Manhua Style | Manga and manhua (page layouts with complex arrangements) | Settings → Panel Detection Model |
💡 Tip
If the AI misses some panels or splits them incorrectly, click on any page image in the grid to open the Crop Editor. You can manually draw or adjust the panel boundaries by dragging the edges and corners.
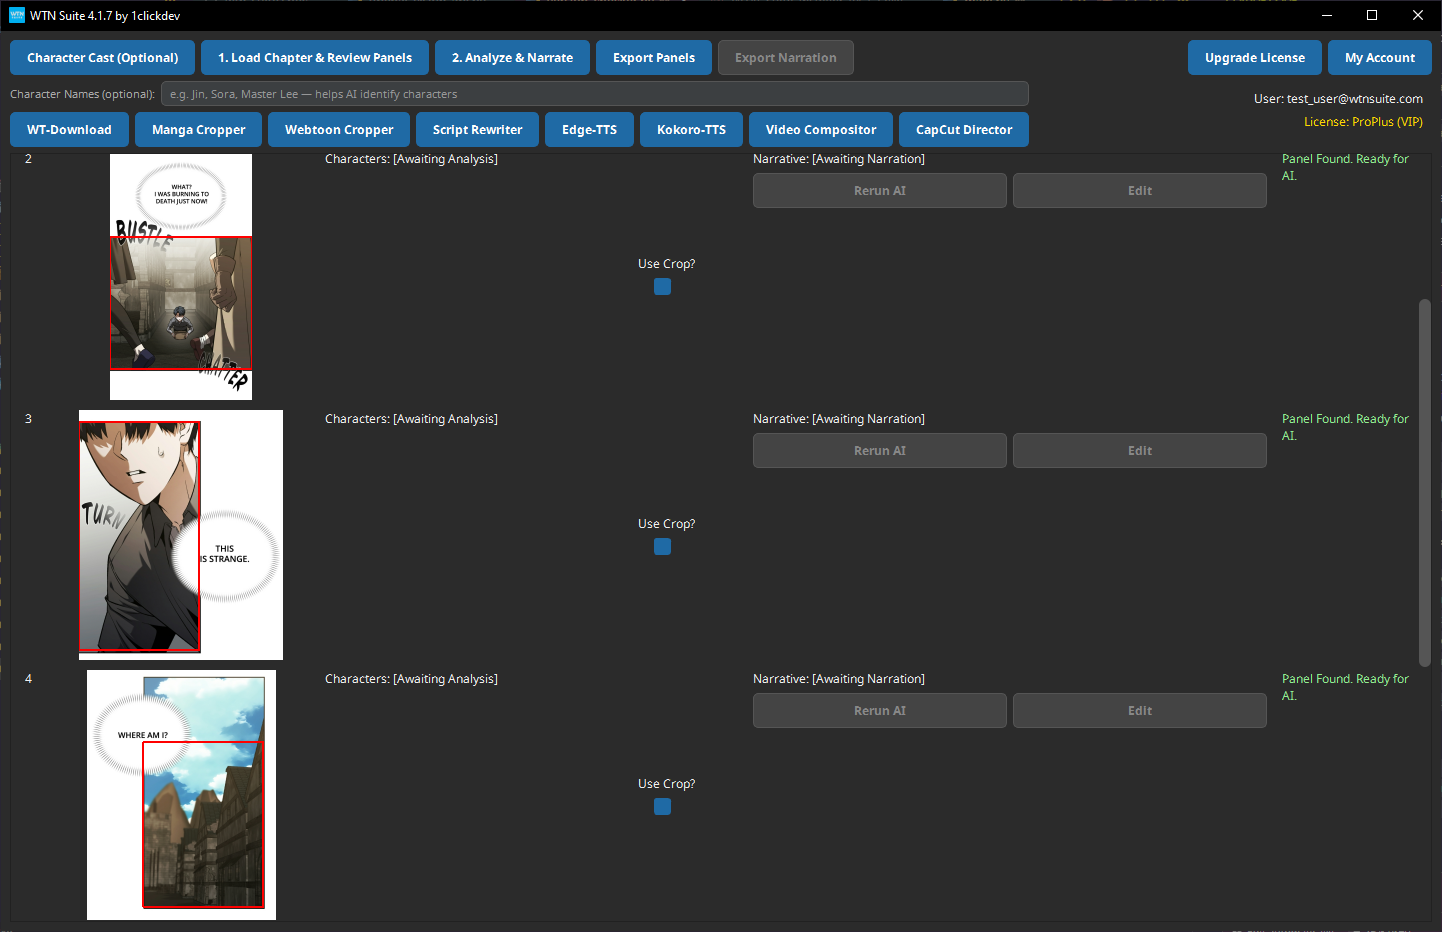
After detection, each panel appears in the main grid showing:
- A preview of the panel image
- Character list (initially "Awaiting Analysis")
- Narrative text (initially "Awaiting Narration")
- Status indicator
Scene Analysis
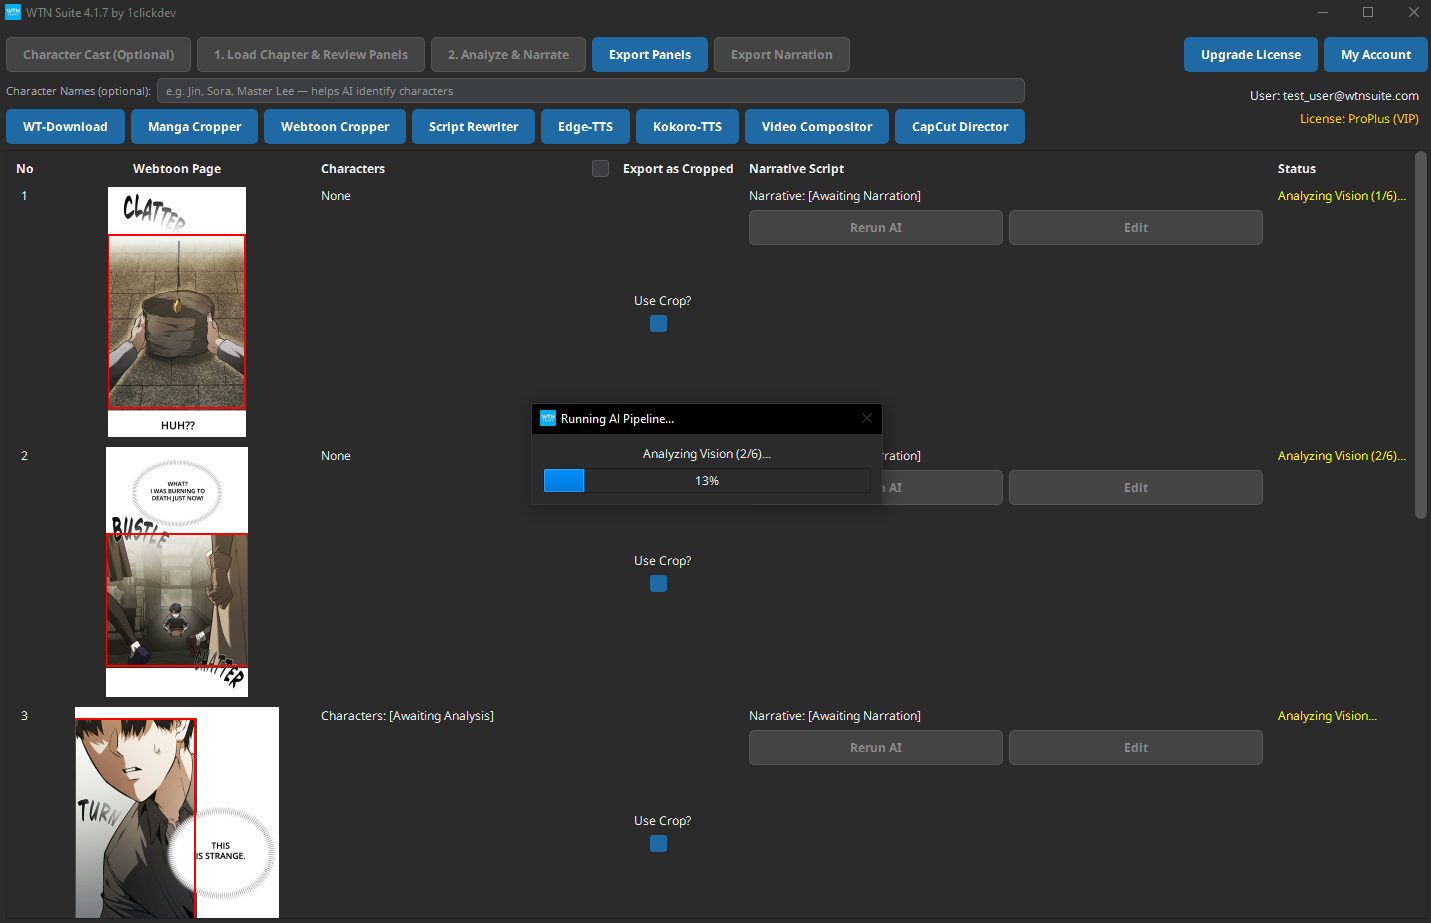
Click "Analyze & Narrate" to start the AI pipeline. Scene Analysis runs first.
The AI looks at each panel and describes what's happening — characters present, their actions, emotions, the setting, and visual details. This analysis feeds into the Narrative Writing stage.
ℹ️ Info
Auto Character Handling (v4.1.7). The AI now automatically detects and tracks characters across panels — no manual character setup required. You'll see consistent character references throughout the narration. For even more precise control over character names, you can optionally use the Character Builder.
What the AI identifies in each panel:
- Characters and their names (auto-detected)
- Actions and movements
- Emotions and expressions
- Scene setting and background
- Important visual details (text bubbles, effects)
Narrative Writing
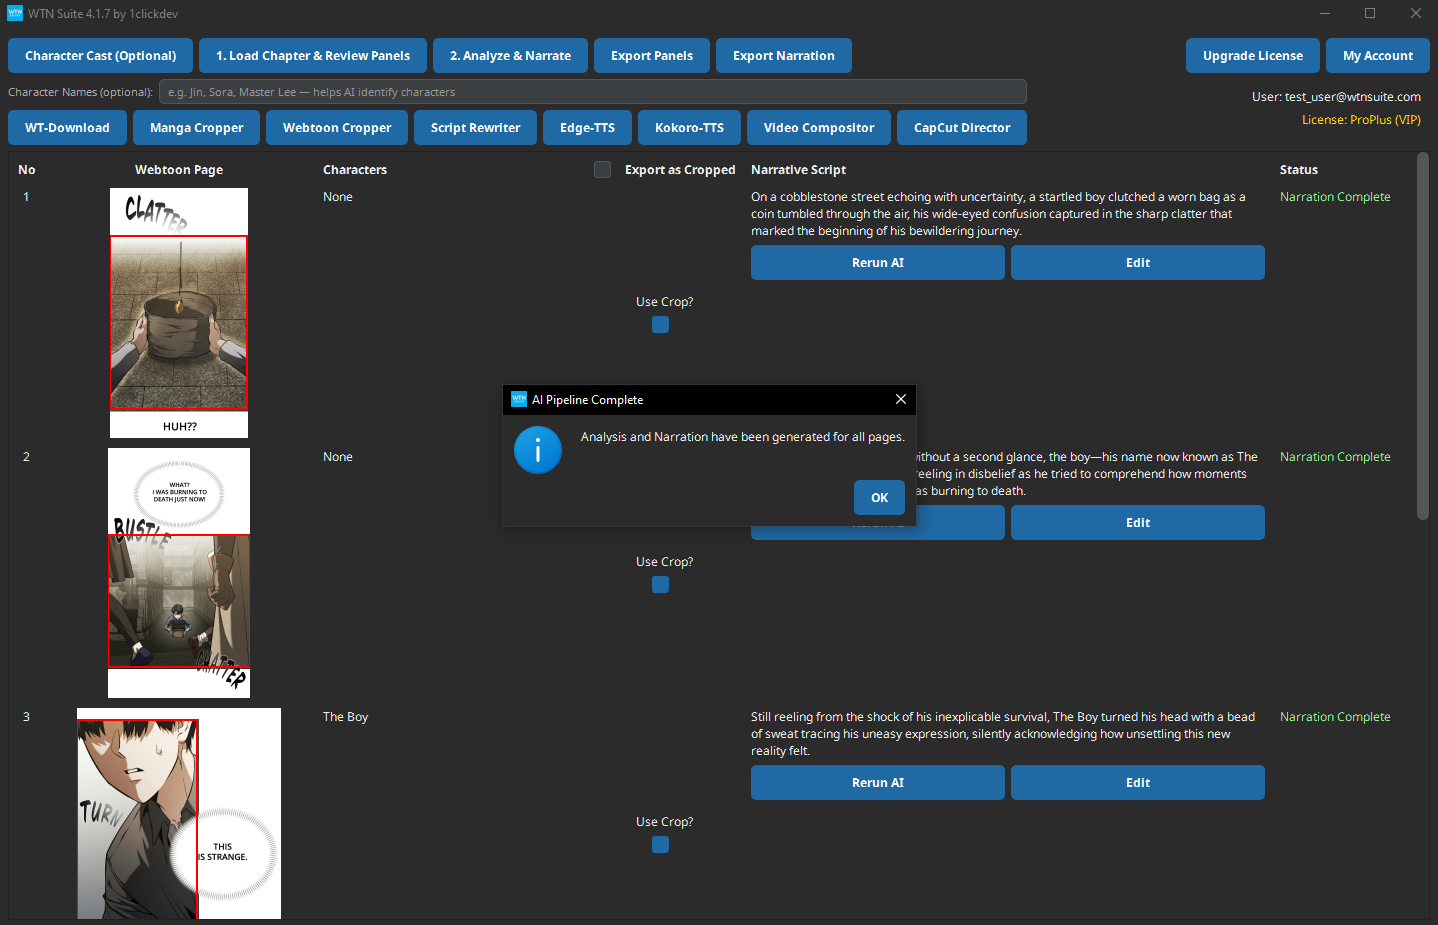
Narrative Writing runs automatically after Scene Analysis finishes.
The AI takes all the scene analysis results and writes a continuous narration script — a story that flows from panel to panel with smooth transitions.
Narrator Prompt Templates
You can choose how the AI writes the narration by selecting a template in Settings:
| Template | Style |
|---|---|
| Master Prompt v4.1 | Cinematic storytelling with continuity rules — works best for most content |
| Template 2 v4 | Choose between Pure Narration, Character Interaction, Visuals Only, or Mixed styles |
| Template 3 v3 | Simplified version of Template 2 — faster processing |
| Khmer Language | Narration in Cambodian/Khmer |
| Custom Prompt | Write your own instructions for full control |
💡 Tip
Start with Master Prompt v4.1 — it produces cinematic, engaging narration that works well for most webtoon genres. Experiment with other templates once you're comfortable with the pipeline.
Reviewing and Editing Results
After the pipeline finishes, review the results in the main grid:
- Edit narration: Click "Edit" next to any panel's narrative text to modify it directly
- Re-run a single panel: Click "Rerun AI" next to a specific panel to regenerate its analysis and narration
- Export panels: Click "Export Panels" to save cropped panel images to a folder
- Export narration: Click "Export Narration" to save all narrative text as a TXT file
💡 Tip
It's worth spending a few minutes reviewing the narration before generating audio. Small edits to the text (fixing character names, smoothing transitions) can significantly improve the final video quality.
Next Steps
Once you're happy with the narration:
- Generate audio — Use Edge-TTS (all plans) or Kokoro-TTS (Standard/Pro) to convert text to speech
- Create video — Use the Video Compositor to combine panels + audio into a final video
- Advanced editing — Export to CapCut Director (Standard/Pro) for animations and subtitles
- Refine characters — Optionally use the Character Builder if you want to assign specific names to auto-detected characters