Character Builder
Assign custom names to characters for more precise AI narration
Character Builder
The Character Builder lets you assign specific names to your characters so the AI uses them consistently throughout narration.
ℹ️ Info
New in v4.1.7 — Auto Character Handling. WTN Suite now automatically detects and tracks characters during scene analysis. You don't need to build a Character Cast to get named characters in your narration.
The Character Builder is for when you want exact, custom names — useful for series with established character names, multiple similar-looking characters, or when you want precise control over how characters are identified.
Why Use It
Without Character Builder (Auto mode, default):
"A girl with blue hair steps forward, looking at the tall man beside her."
With Character Builder (custom cast):
"Mia steps forward, her eyes locked on Jin as he braces for what comes next."
If precise character names matter for your content — especially for an ongoing series — the Character Builder gives you that control.
When You Need It
- Your webtoon has established character names you want the AI to use consistently
- Auto detection confuses similar-looking characters
- You're producing a series and want exact name consistency across all chapters
💡 Tip
For most users, Auto Character Handling (built into the pipeline) is sufficient. Use the Character Builder when you need precise name control for specific characters.
How to Use
Open Character Builder
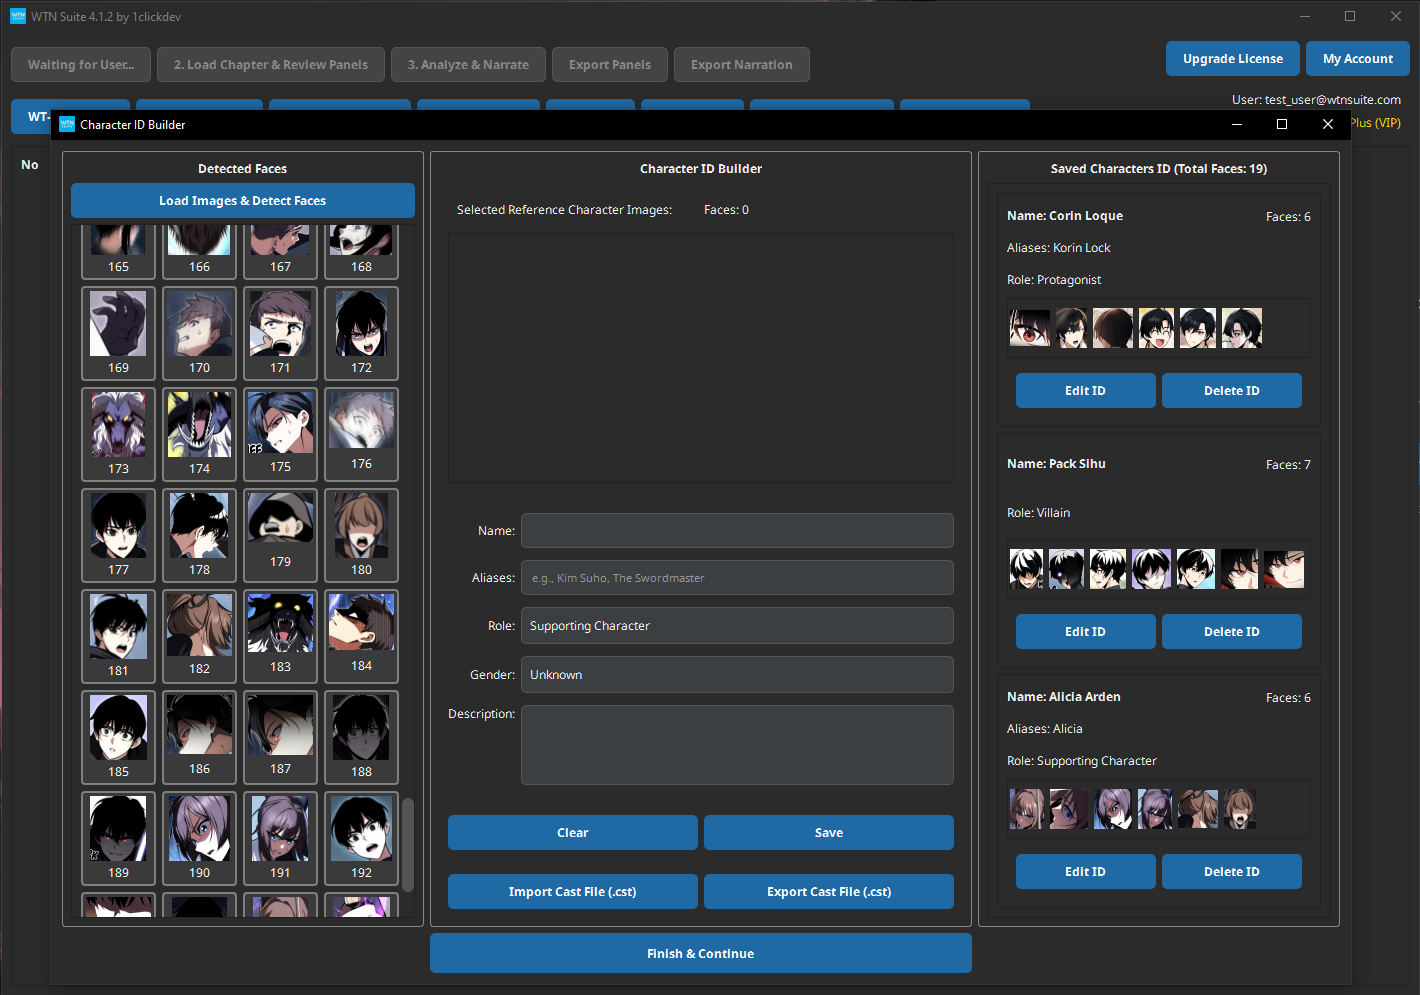
Click "Build/Load Character Cast" on the main toolbar. The Character Builder window opens with three panels.
Load Sample Images
Load 3–5 panels that clearly show your characters' faces. The AI works best with images where characters are:
- Facing forward or at a slight angle
- Clearly visible (not too small or obscured)
- Showing different expressions
Review Detected Faces
The AI automatically detects character faces in your sample images. Detected faces appear in the left panel as a grid of thumbnails.
Name Your Characters
For each detected face:
- Select it in the left panel
- Type the character's name (e.g., "Mia", "Jin", "Professor Kim")
- Click Confirm to save
Named characters appear in the right panel as your completed cast.
Save Your Cast
Click "Finish & Continue" to save the cast as a .cst file. This file can be reloaded for future chapters.
Using Your Cast in the Pipeline
- Before running Step 2 (Scene Analysis), load your
.cstfile - The AI uses the stored visual data to recognize faces in each panel
- Characters are identified by name throughout the analysis
- Names carry through to Step 3 (Narrative Writing) and audio generation
Features by Plan
| Feature | Basic/Standard | Pro |
|---|---|---|
| Build new Character Cast | Yes | Yes |
| Export Cast (.cst file) | Yes | Yes |
| Import existing Cast | — | Yes |
ℹ️ Info
Pro plan lets you import Character Casts across projects — build a cast once for a series and reuse it for every chapter.
Tips
💡 Tip
3–5 clear images per character gives the best recognition accuracy. Include shots from different angles and expressions so the AI can recognize characters even when they look slightly different.
💡 Tip
Be consistent with names. Always use the same name for the same character (e.g., always "Mia" — not sometimes "Mia" and sometimes "Main Character"). This keeps the narration consistent.
💡 Tip
Update your cast when new characters appear in later chapters. You can add new characters to an existing cast without rebuilding it from scratch.
Common Issues
⚠️ Warning
Face not detected? If a character's face isn't automatically detected, try loading images where their face is larger and more clearly visible. Partial faces, masks, or very stylized art may not be detected.
⚠️ Warning
Wrong character identified? The AI may occasionally confuse similar-looking characters. Adding more sample images with clear differences between characters helps improve accuracy.
Next Steps
- Pipeline Overview — Load your cast and run the AI pipeline
- Quick Start Tutorial — Full walkthrough using Character Builder in the workflow